Finish all activities. It is time to pick up your bounce house and deliver it back home. How to recover back it as a nice and tight roll? You were eager to gain a better way to take down it. I have a method for you. Compare to set up. Takedown is much easier and faster.
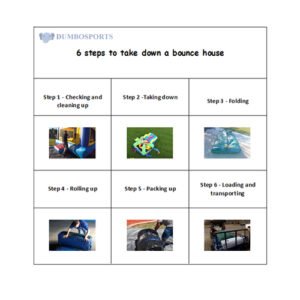
Here is the way to teach you faster and better to deflate your bounce house. I will instruct it in 6 steps.
Follow me step-by-step.
Step 1 – Checking and cleaning up
Let us check and clear the bounce house first.
Make sure all kids are off the bouncer. If it is powered off, open the blower and inflate it. Walk around and check if there is any leakage, tear, or rip on it. Make sure it is in a good situation. Then go inside for checking. Remove away all dirt or debris on the surface. Make sure no sharp object damages our jumper when we fold and roll. No need for thorough sweeping and cleaning. Finish all these checks. Now ready to tear down it.
Step 2 –Taking down
- Turn off the Blower
Unplug the Blower and let out the air.
- Open all inlets and outlets and unzip all zippers
Let the bouncer deflate as quickly as possible.
- Pull the anchor
Pull the anchor from the first corner. If it’s too deep to pull out, hit him with a hammer,
it’s easy to pull out.
Use this anchor, and with a pry, the second one comes out. Pull out all the other anchors in this way. Keep them away from the jumper.
- Collect all other accessories, extension cord, hairdryer, hammer, etc.
Put them together and far away from the bouncing house.
Step 3 – Folding
About folding and scrolling. I’m good at this. After sorting out all the family members’ clothes and bedrooms, I discovered a secret. Everything can be folded small and tight, such as clothes, quilts, or even stockings. Fold it as many times as you can.
At first, roll it uptight and thin. Until finally it can stand on its own. I took the idea to our workers. They folded the bounce house according to my way. We ended up with a roll that was two-thirds the size of the previous one. They didn’t like it at first, as it took them an extra more five minutes to fold it. But after they became adept at using my methods. They became especially fond of using them. Because they found that now it only takes extra more three minutes. They have more space to store more toys. It is easier to load and transport as now the roll is compact.
To make it easier to understand. I divided a bounce house into six sides.
Let us explain it more clearly and in detail to avoid misunderstanding later.
We will call a blower tube for the backside. The entrance for the front side. Left and right for the two sides. The underneath for bottom. The other parts for the body.
Usually, we fold both sides and the body (including the ornaments, ports, entrances, etc.) first. Second, roll it from front to back into a small drum.
Here, to make folding and rolling easier, we have a team of two.
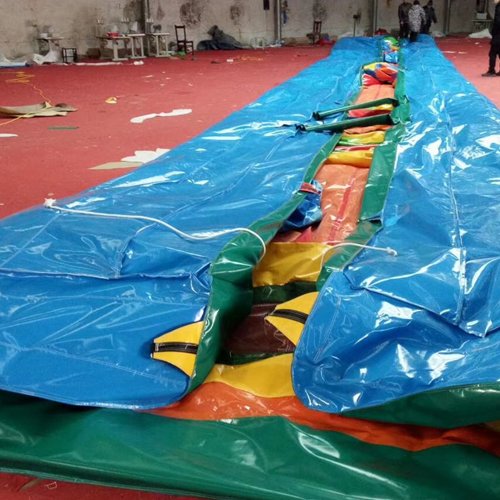
Folding it into a long rectangle after deflating.
- Fold the ornaments and the entrance inside. If it’s too big to come out after fold one time, fold it twice or more until it’s all in the middle.
- Pull out the bottom seams first, fold the edges of the seam outside, flatten them out. Make sure they are inside later.
- Leave the ports outside so the air can escape.
- Pull the belt or D-ring on the left side, one person at a corner. Folding in half to the middle.
- Wait for 1-2 minutes until the air is out. Or walk towards ports to help deflate. Pay attention no walk with shoes on the surface of the body. Avoid damage to the vinyl.
- Fold the right side in the same way.
- One person pulls on one corner and folds it in half again.
Step 4 – Rolling up
Now it is a long strip. Start rolling up it.
Work in teams of two. One person rolls up, the other walks backward to let the air out.
- Roll from the entrance to the port. Make it as tight as you can. Roll it tight and compact from the beginning. If you start with a smaller role, it will get tighter later. That is easy for us to understand if we have a fold quit.
- Now we have a pause when we fold in two-thirds part.
- Fold the opposite side in half. Tuck in straps underneath. Then pull the port back. Neglect this step if you leave the strap underneath when set up. I have an article specially for “how to set up your bounce house”. You can check details there.
- Fold the port part. Tuck the blower tube and decorations inside to avoid damage during transportation. Roll it in 2 feet, and stop.
- Roll from the opposite side, until tuck the port side inside. Finally, make it into a completely nice firm roll.
Step 5 – Packing up
Tie the strap tightly on the roll.
To make transportation easier and more convenient, we used two straps.
Knot the extra straps to prevent slide down or drag on the ground during transportation.
Put the roll in a storage bag if you have one.
Step 6 – Loading and transporting
Make the toy roll stand up and push it onto the trolley. Pick up all the accessories. Load them into your truck and go home.
If you need to pick up a jumping house quickly. Check out this video. This is how we used to do. It is quite useful when you are in a hurry.
Follow these six steps to get a nice and tight roll of yourself.
Last but not least, please leave a comment to me if you have any ideas about it.
