One day you found the moonwalk is leaked and deflated seriously. Sometimes even can not stand it anyway. That may be some hole, tear, rip, a seam on it. Anything that happens, will be a disaster for you. An inflatable bounce house is durable and strong. But overuse or improper use will damage it. Don’t worry and scare. No need to throw it away. But no use anymore as it is not safe after damage. Repair it as soon as possible.
How to repair a broken bounce house? Here are 3 steps to teach you do-it-yourself.
Once you learned the tips, When accidents happen, you can fix them by yourself. Thus You can run a sustainable and earn money. No need to waste a rental opportunity by sending it in for repair. Let’s see how to do it.
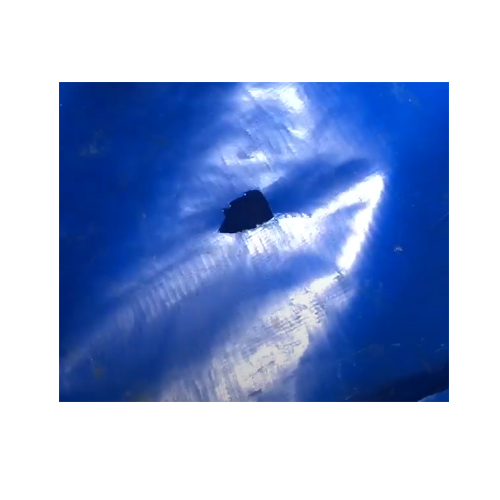
Step 1: Find a hole, tear, rip or seam in a Bounce house
Once the leak happens. Inflate your bounce house and go around it and see what happens.
Small seam damage
Easy to find if hearing a loud hissing noise, means the air leaking away. Need to repair it soon as it is already a little dangerous. It may deflate completely soon.
Small rip
You will see it at the first glance. No takes you too much time.
A small hole or tear
Walk around and look at it carefully. It is easy to find out.
Pinhole
It is very hard to find if it is a pinhole. Go around it and see if someplace is softer than other places. If not found, don’t be sad. Sometimes it hides deeply. You will know this way I told you if you have checked a leaking tire. Use soapy water. Prepare some plain dish soap, spray bottle, water, and a wipe. All these are easy to get. Make sure your do-it-yourself soapy water creating bubbles. Apply soapy water to the bounce house. When covered with soapy water, bubbles are created in the leaking area. Marked down the hole using a pencil so you know where to fix it. To avoid loss from sight when you are ready for the patch and glue.
Step 2: Prepare repair tools
Usually need to prepare these tools to patch the different damages. You can source them one by one. Or repair kits or patch kits are good choices if you don’t want to search tools one by one.
Single tool list
Tool 1: Patches
Patch material
There are many kinds of material. First of all, we choose 18 oz vinyl patches in commercial grade. It is durable and UV resistant.
Color
There are different colors. Red, Blue, Yellow, Green, Orange, Purple, Black, and White, etc. Make sure to choose the same color with your moonwalk.
Size
Usually, they are sold by the yard. Need to confirm the size with the seller before order.
Tool 2: A pair of scissors
Tool 3: A pencil
Tool 4: A Sewing awl kit
Tool 5: A can of vinyl cement
Available in 3 different sizes.
4 ounce can of glue
8ounce can of glue
16 ounce can of glue
Tool 6: A brush
Tool 7: A hairdryer
Tool 8: A roller
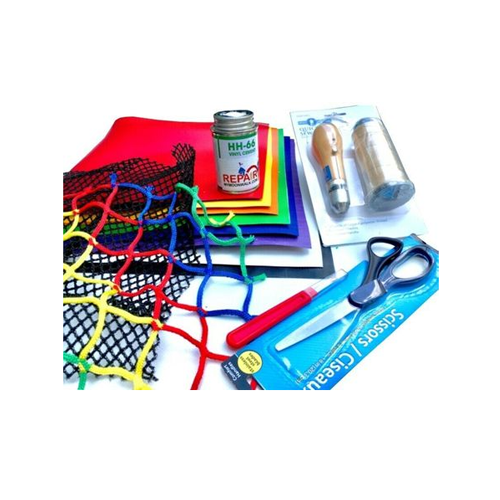
Repair kits or patch kits
Moonwalk repair kit
Repair kits contain different colored patches of 18 oz vinyl. Including Red, Blue, Yellow, Green, Orange, Purple, Black, and White. A 4 oz can of high-grade industrial strength ultra-vinyl glue. A combination sewing awl. One curved needle.
A swatch of rainbow netting and black netting for windows. Thread, scissors, seam ripper, and a storage bag.
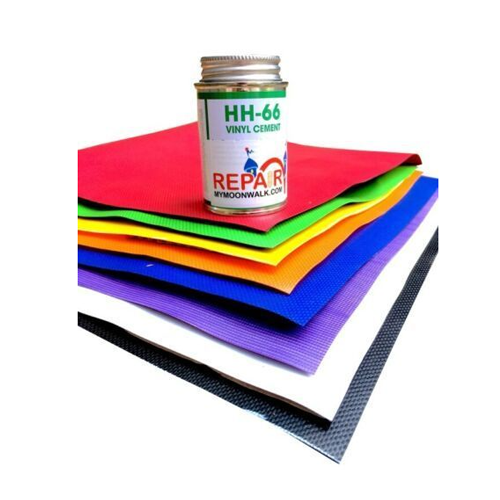
Patch kits
The inflatable patch kit contains 8 pieces 10″x 10″ vinyl patches and a 4-ounce can of cement glue.
Step 3: Repair methods for 4 types of damaged inflatable
Damage 1: Pinhole, small hole, or tear
Point 1: Clean the damaged area
Clean the torn area, wipe away the dirt, grease, mud, water, and debris from the surface. I did this to make sure the patch can be better sticking.
Point 2: Cut the edge of patch round shape
For stronger adhesion, I prefer to cut the patch into a round edge. Rounded corner patches stick more firmly and do not fall off easily. I will measure the size of the tear, and cut a patch in 4 sides 2 inches larger than the tear. This makes the seal more tightly, durable, and sturdy.
Point 3: Mark the torn area
Put the patch on the torn area, mark it around it with a pencil. At the same time make a special mark on both patches and torn apart. So that you will know where to glue later.
Point 4: Apply the glue
Check the torn area and waiting for it dry. Apply glue on the torn area we drew just now. Do the same thing for the patch too. I have two little tips here. First, the glue will be an even and thin coating, not too thick. Second, Make sure to glue on the rough side of the patch. This is the secret to better stick.
Point 5: Flatten the patch
Waiting for 2 to 5 minutes and allow the vinyl cement to dry. Or you can touch your patch, feel dry but not dry too much. That is a feeling your finger is not stick on it. Now you can flatten the patch on the torn area. Here you need a blower or a roller. Tools help faster dry and press stronger. Make you more effective. Forget about these tools if you don’t have anything on hand. Just use your hands. Heavily press them again and again until they patch together tightly.
Point 6: Final check and make sure it is firmly sealed.
Now you get a nice and sturdy patch. Let’s final check the patch to see if it adheres to the inflatable. Wipe off the excess glue with a rag. Wait for 2 hours and make sure it is totally dry. Jump hard on it yourself. Congratulations you did a good job if everything is ok.
Damage 2: Small rip
Indeed it is not complicated to fix a small rip. Just a little difference from patch a hole. Need do one more step. We repair from inside before we do outside.
In order not to repeat me I will only explain this new step. All the other steps you can follow in repair a hole.
Key 1: Patch from inside after we drew around with a pencil.
Key 2: Clean the inside surface of the inflatable before applying glue.
Key 3: Coating thin glue both on a patch and inside surface. It is better to find a helper if it is hard to applying glue on the surface.
Key 4: Let the patch go under the rip after dry.
Key 5: Flatten it.
Key 6: Wait for 30 minutes, make the outside patch after dry.
This video shows you how to make double patches by hand.
Damage 3: A small broken seam
Here we use a sewing awl kit to repair the damage. To sewing it with a lock stitch in the whole process. It is as easy as you sew a broken bag or shoes.
The point is to make sure you start sewing from about a quarter-inch from the damaged area.
Sewing the whole broken area. You should have two ends of the thread on the same side. And finish off the stitch by securely tying the thread ends together.
Here is a video showing how to repair with a sewing awl kit.
Damage 4: Accidental injuries
Damage occurred suddenly when the party is going on. A small hole or tear occurs. You have no way to stop this party right away. It will turn into a disaster. At this moment, you need a repair tape.
Rapidly clean up the broken surface. Cut the round edge of the tape, peel off and stick it on the damaged position directly.
It temporarily keeps the damage from continuing. This tape repair method is not permanent. It suits the urgent situation only.
Once the crisis is gone. Go to fix it use the other 3 ways we learned from this article.
Last but not least, please send it to the fix company for the serious damage you cannot deal with in these ways.
I hope you have mastered all the repair methods. Please feel free to write to me if you have any other questions.